
In this year and age, knowing how to create a website for business whether yours or not is one skill that is now essential to business growth. There are a variety of reasons people want to learn how to build a website from scratch for their business. Whatever your reason may be, you will be able to build your own website from scratch and launch it with this detailed guide for beginners.
Before we get started, if you need your business website designed by a professional web designer at cost-effective prices, get in touch here.
Why You Need to Learn How to Create a Website for Business
As has been stated above, your reason for wanting to learn how to create a website for business may be different from the next man. But below are some of the reasons why you need a website for your business.
- Credibility: According to Forbes, “one of the main reasons you should build a website for your business is to increase your organization’s credibility” There is a good chance that people may question your credibility as a business without a good website.
- Save time and help customers: Prospects and customers often want information like business location, hours of service, phone number and more. You can help them by providing those information on your website. You also save the time customers would used to call and ask for such information.
- Leads increase: One of the most important benefits of having a website is to increase leads and boost growth. Prospects can easily find you online and contact you if you have a website. In addition, you can generate up to 220% more leads with the right landing page on your website.
- Prospect and customers expect it: Your customers and new prospect expect that you should have a business website, and if you don’t, you may loose them to the competition. If you refer a company to anybody, the first place they would likly go is check them out online.
- Control the narrative: A well optimized business website help to influence your brand perception by carefuly writing your own story that stands your brand out. A website is highly efficient in convicing prospect and customers to choose you.
The Verdict
From the above, it is clear that having a website is absolutely a prudent growth strategy move for your business. Study shows that 97% of consumers search for local businesses near them online. Therefore, if you truly want to grow your business, you need to be in front of the right audience online with a website.
Additionally, over 50% of smartphone users found/discover a new company or product while searching online. From the above, its clear that not having a website can do some considerable damage to your brand credibility.
Step One on How to Create a Website for Business: Domain and Hosting
One of the key elements of learning how to build a website for your business is the selection of the right domain and hosting.
Domain
As a rule of thumb, if you are designing for your business, the domain name is normally the business name or derived from it. For instance, if your business or company name is Stem Gell Limited, your domain name should be www.stemgell.com.
Also, your domain extension is of great importance as well. Always go for top-level domains (TLDs) when registering your domain. Try as much as possible to get a .com domain unless your business is localized and you are not really after international traffic.
Therefore, first search for a .com domain. And if your business is restricted to your country only, you may want to go for your country extension like .us, .co.uk, au, etc. Other top-level domains you may want to consider if you can’t get a .com is .org, and .net, .co. According to Curvearo, a .com extension further gives authenticity and credibility to your business. Everyone would normally assume your website is a .com. See what else you can do if your .com domain is not available.
Hosting
Choosing the wrong hosting for your website can completely ruin your online presence. The factors that are important when considering hosting are uptime, speed, space/bandwidth, support and pricing.
We have used one of the best hosting service providers for this guide on how to create a website for business. All you have to do is follow the steps to get your business website online with a reliable service.
Get Domain and Hosting
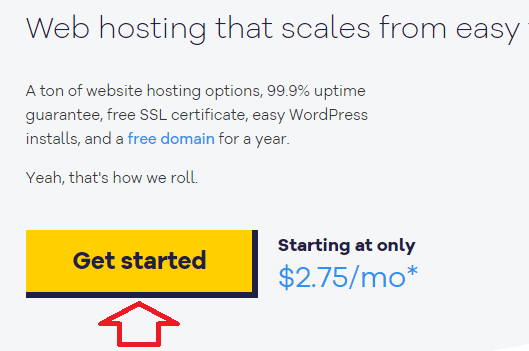
As has been stated earlier, the very first step to learning how to create a website for your business is to get your host and domain name. This recommended host comes with a free domain, SSL certificate, $150 Google Ads credit, $100 Microsoft Advertising credit and more at 60% off special discount offer click here. You get everything for below $60.
Clicking the button above would take you to the Hostgator website where you can purchase your host at promo rate of $2.75 a month and still get the amazing free benefits above. The next step is to click get started as shown below.
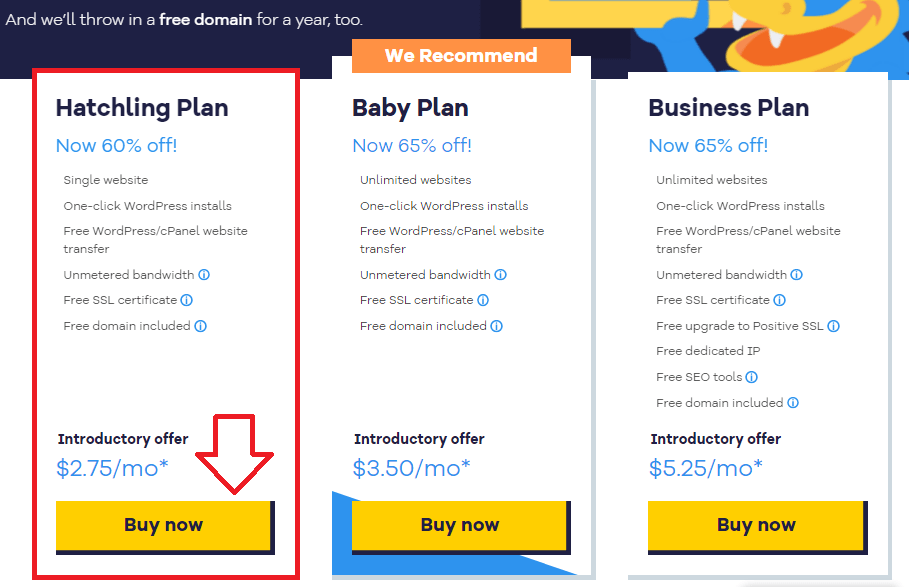
Now select the Hatchling plan if you want to design just one website. If your goal is to design more than one website, choose the Baby plan
Choose a Domain Name
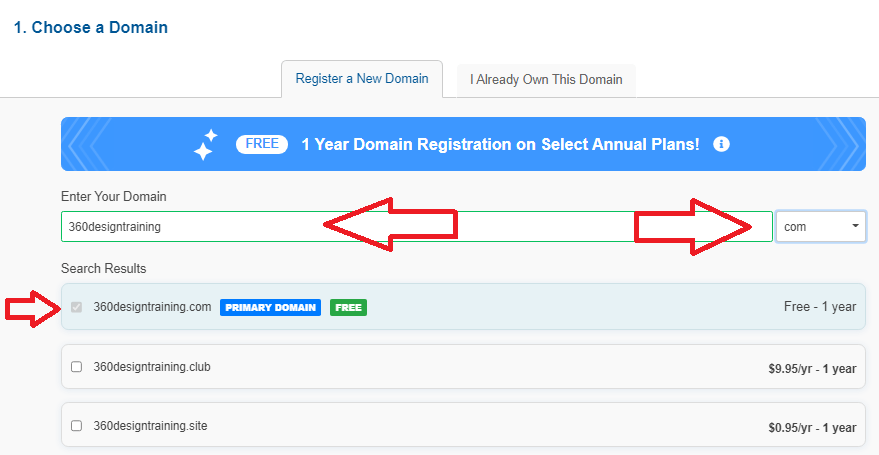
Clicking on buy now above would bring you to the section to choose your prefered domain name for your business website. In this section, type your domain name in the section provided and click outside the search box to allow the system to search whether your domain of choice is available as shown below. Additionally, at the far right side of the search domain search bar, you will find the option to change the extension from .com which is the default extension.
If you would want to use another extension like .org or .net, etc. Click the .com drop-down and select your prefered extension.
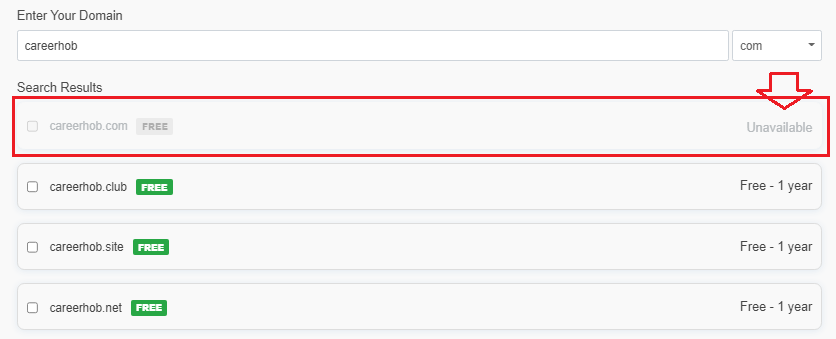
There is the possibility that your domain name of choice has been registered by another person. In such cases, you can either modify the domain name and search again, or choose another domain extension.
When the domain name has been purchased by someone else, the result would show unavailable on the far right where it would normally indicate “free – 1 year”, followed by other results of the domain availability in other extensions like .net, .club, .org, etc.
After the availability of your domain name is confirmed, you can scroll down to the domain privacy protection option.
Domain Privacy Protection and Plan Billing Cycle
Domain privacy protection is an optional domain service billed at $ 14.95 yearly. It helps protect your identity online by hiding your personal contact information from public view.
I would normally uncheck this because I don’t pay for domain protection as I don’t see the value. But if you don’t want your name associated with the domain name registration you may add this service.
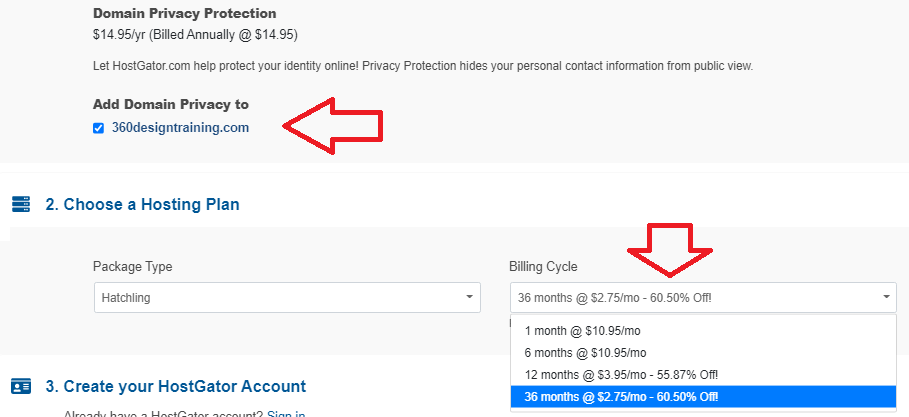
The other sections involve you entering your email and password for automatic account creation, choosing a PIN for extra account security, entering your billing information and making payment.
Add Additional Service
You really do not need to add any of these services. The most important here is the backup service which would be taught in this guide, and the SEO service tagged “Improve Your Search Ranking and Increase Website Visitors.” If you like you may choose the SEO service.
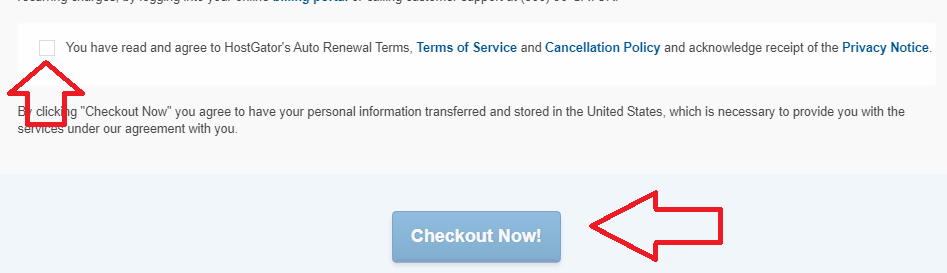
Checkout and Start Creating a Website for Your Business
To complete your hosting and domain purchase that will enable you to create a website for your business, make sure you check or tick the agreement to terms before clicking checkout.
Account Creation and Website Installation
Congratulations, you have gotten to website installation stage in the journey of how to create a website for business. When you click on checkout above, you would be redirected to your hosting account auto-setup as shown below.
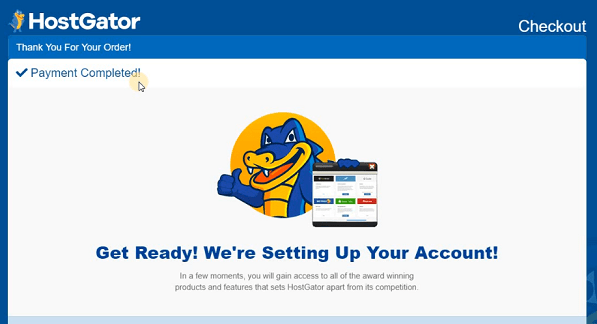
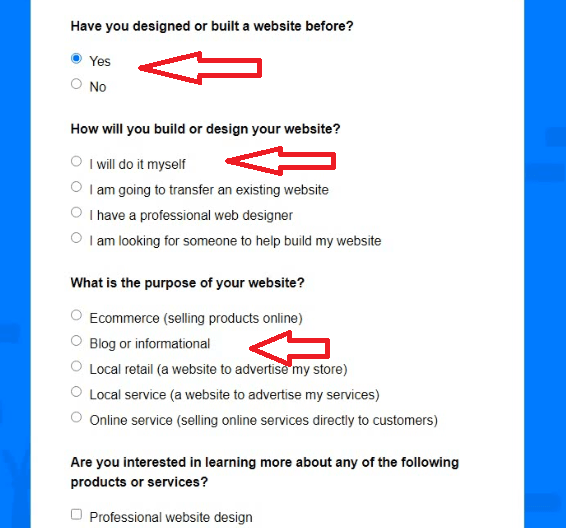
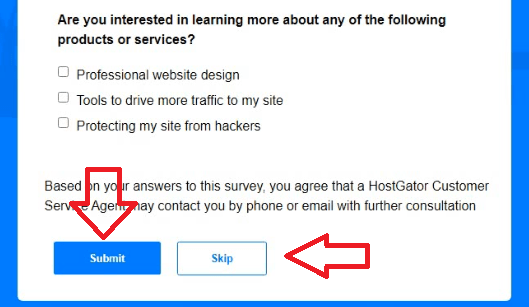
All you have to do now is wait for a minute while your account is being created. Now answer the questions that would pop up and click submit as shown below or skip answering the questions.
Step 2: Build Your Business Website With WordPress
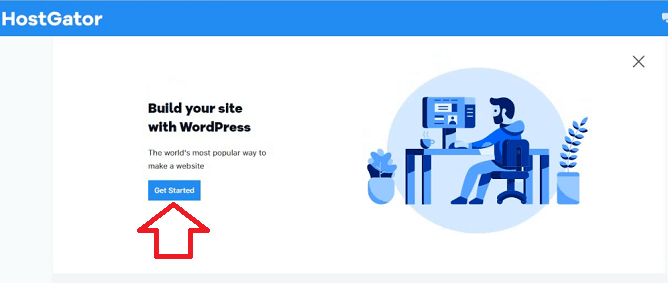
If you have been bugging yourself with the question “how can I create a website for my business”, worry no more because your website is about to go live. In the next screen, click on get started as shown below to install your website with WordPress.
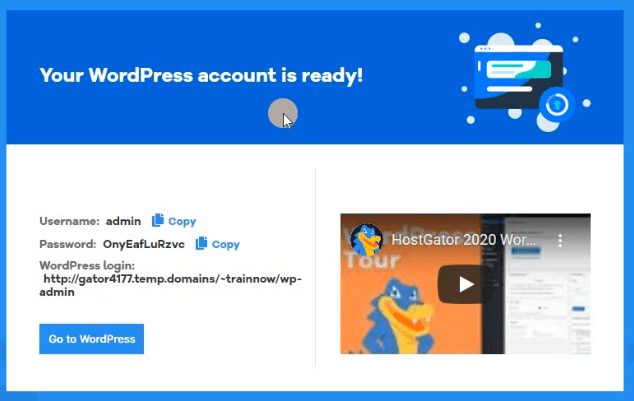
Now that your website is installed and live. Copy your username which is admin by default and password. Your website password would be changed later. Before we login into the website admin area and start designing let’s talk briefly about WordPress that we are using for the design.
Why Use WordPress for Your Design
Certainly, there are many website building platforms that you can use when building a site for your business. These platforms are normally called Content Management Systems (CMS).
Of all the CMS for web development, WordPress is by far the most popular and efficient. In fact, WordPress powers 39.5% of all websites on the internet as of 2021. The other two CMS platforms that follow are Shopify and Joomla at 3.2% and 2.2% respectively.
The idea of a CMS for your business website design is to give you some easy-to-use tools so that you are able to design and edit your website’s content without any knowledge of coding.
Using WordPress to publish content to your website can sometimes be as easy as making a post on Facebook. That is why WordPress is perfect for your website, as you can set up something lovely without worrying about coding skills.
WordPress Uniqueness
- WordPress is an open source software
- Free to use for your website design
- WordPress is the ultimate DIY solution for website creation
- Very SEO friendly
- Extremely versatile – You can build and run any type of website with WordPress
- Fast, safe and secure
- Highly customizable
- Websites are easy to maintain
- Any WordPress website is totally scalable
Step 3: WordPress UI Tour
With your website ready, the next step is to log in to the website admin area also known as the WordPress user interface (UI).
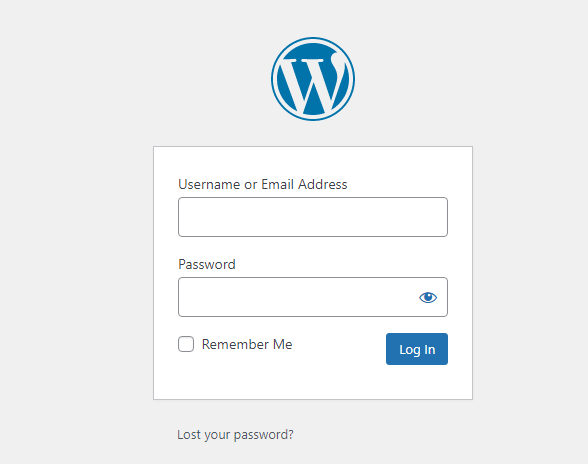
The default website URL for admin interface for a WordPress website is www.yourdomain.com/wp-admin. Therefore, to log in to your website admin type your domain in browser, followed by /wp-admin. For example, if your domain is www.gainsystem.com, your admin URL would be www.gainsystem.com/wp-admin.
Entering your admin URL would lead you to your login page as shown below.
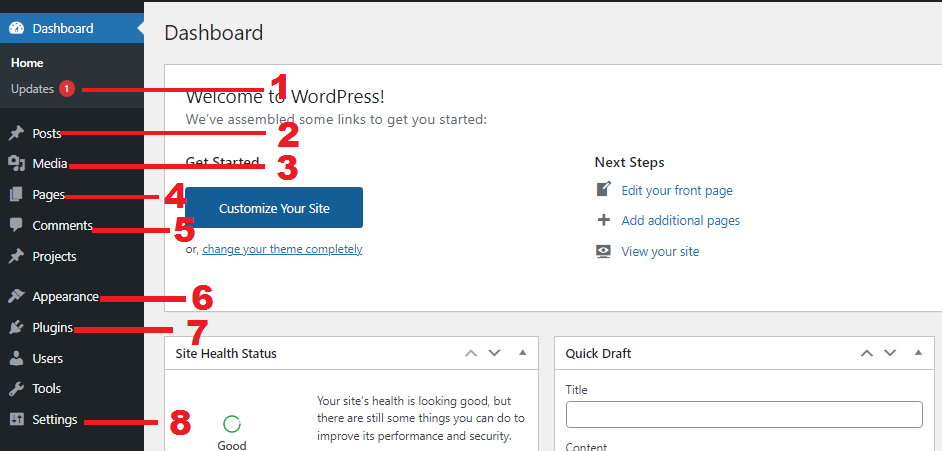
- 1.)Updates: Here is where you find all plugins and themes you use for your website that needs to updated. The number that shows here indicate the number of updates to be made.
- 2.) Posts: Under this section, you can make posts, check all posts, create categories for blogging purpose and create tags. For you learning how to create a website for business, this section is not important to you unless you want to create a blog later.
- 3.) Media: All photos and pdf uploaded to your site can be located here.
- 4.) Pages: Go to this section to edit pages on your website or create new one
- 5.) Comments: Users comment can be seen in this section once allowed from the settings section,
- 6.) Appearance: In the section, you will find sub menu like theme, customized, menu, widget, and theme editor. While theme menu can take you to where you change your theme, customize lead to theme cutomization, depemnding on the theme in question. Widget mainly apply to blog posts and menu help you cutomize your website navigation.
- 7.) Plugins: Go here to intall new plugins for better customization and optimization of your website.
- 8.) Settings: Main settings for your website. Most plugins would appear under this section after install and activation.
Step 4: Set Your Website Permalinks
Permalinks or permanent links are Uniform Resource Locators (URLs) of your website pages, blog posts, and other archive pages on your site. The primary aim of permalink is to create an easy to understand URL or link structure on your site for both humans and search engines.
Therefore, it is important to choose a URL option available on WordPress that makes your links easy and memorable.
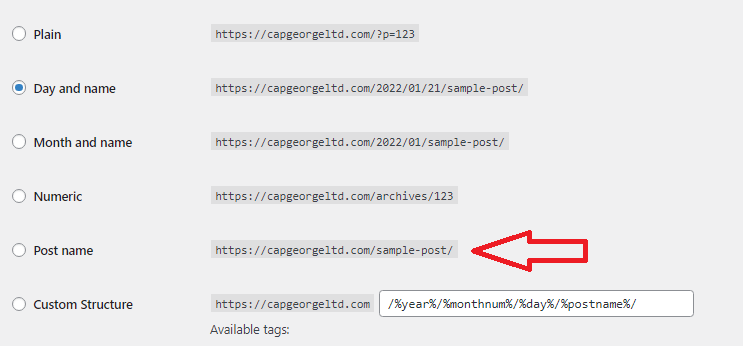
Hence, the most optimized URL structure for you is to have the page’s title in the URL. For instance, your services page link should simply be www.yoursite.com/services instead of those filled with a bunch of numbers, dates and letters. You will achieve this simple structure if you set the permalinks correctly.
By default, the permalinks are set to date and page name, to set it correctly, go to Settings → Permalinks and select post links as shown below. Permalinks is a dropdown menu under settings as has been explained before.
After selecting post name as your permalinks, scroll down and click save to complete to save.
Set 4: Allow or Disable Comments
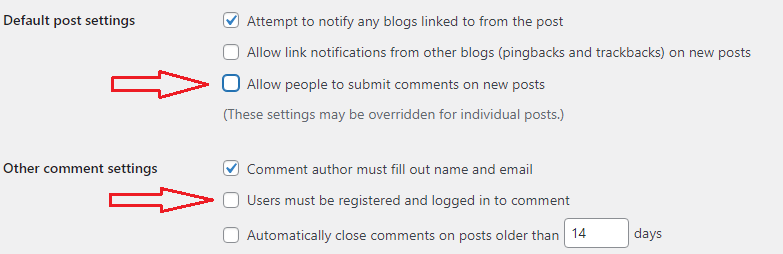
Allow or disable commenting on your website posts. If you will not be blogging on your business website, the best way is to turn it off to prevent spam comments.
But, if you want to build engagement or a community around your website and grow interactions, you will need to set up a blog too and allow comments. I would say, turn off comment for your website until your company decide to hire a content writer for content marketing.
To allow or disable comments, navigate to Settings → Discussion.
Step 5: Making Your Website Visible to Search Engine
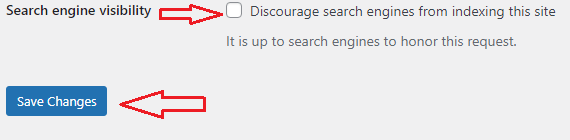
No matter the content on your website and how beautiful it is, if Google Googlebot and other search engine web crawlers are unable to find your website, your business growth agender will be impacted.
To make sure Google and other search engines find your website and index it, go to Settings → Reading and ensure that the box labelled “Discourage search engines …” is unchecked.
It is normally unchecked by default, but make sure that is the case with your website.
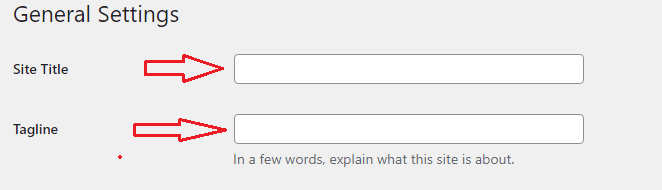
Step 6: Optimize Your Website Title and Tagline
Your website title and tagline should indicate what your website is about. If not changed in Yoast SEO, this is what people and search engines will use to understand your site
Therefore, use a brief title with the right keywords. Your site title should be the full name of your company when creating a website for business, and tagline should indicate what you do.
For instance, Title → Skim Consulting, Tagline → Consulting firm in New York.
WordPress may display them on the site homepage and other pages if not edited. Google in turn uses them when listing your website on the search results pages. You may also leave your website tagline blank if you like.
To change your Title from the default “Just Another WordPress Site“, go to Settings → General and set the Site Title and Tagline fields to what you want them to be.
Step 7: Install Yoast SEO Plugin
Yoast SEO will enable you to create better content for your site and edit the page titles and meta descriptions for your website. With Yoast, you can write what you want Google and other search engines to display to searchers for each page displayed on Google.
There are tons of stuff this plugin does, but for now, will just install and leave it at that. More on Yoast later.
To install Yoast on your site, go to plugins → add new and type Yoast in the search bar to the right. When Yoast appears after the auto search, click install.

Activate Yoast SEO plugin
For any plugin you install on WordPress to be usable just like the themes, you need to activate them. In this case, just click the blue activate button in the plugin after installation to make it functional.

Step 8: Choose a Theme to Design a Website for Your Business
One great thing about learning how to create a website for a business with WordPress is that it works with interchangeable designs – called themes for free. WordPress has tons of free themes and plugins you can use to design your business website for free.
You can find these themes in the WordPress theme repository. These themes that are maintained and updated regularly are totally free to use.
As a result, you can totally switch the way your WordPress website looks without any monetary cost to your company unless you prefer to get a more elegant premium theme.
Whether your website is a travel agency website, business directory or any other kind of corporate website, you can use some of the most popular free themes on the official WordPress theme repository for your design.
For this guide on how to create a website for business, we will use the Astra theme for our business website design. Astra is one of the best free themes in the WordPress theme collection. The Astra theme is free to use, but they also have paid designs for those looking to set up their website with a pre-designed theme.
The website contains lots of predesigned free and paid themes you can choose from. What makes it easy is that you can browse through their theme collection, decide on the one you want to use, come back to WordPress, install it and import the demo data.
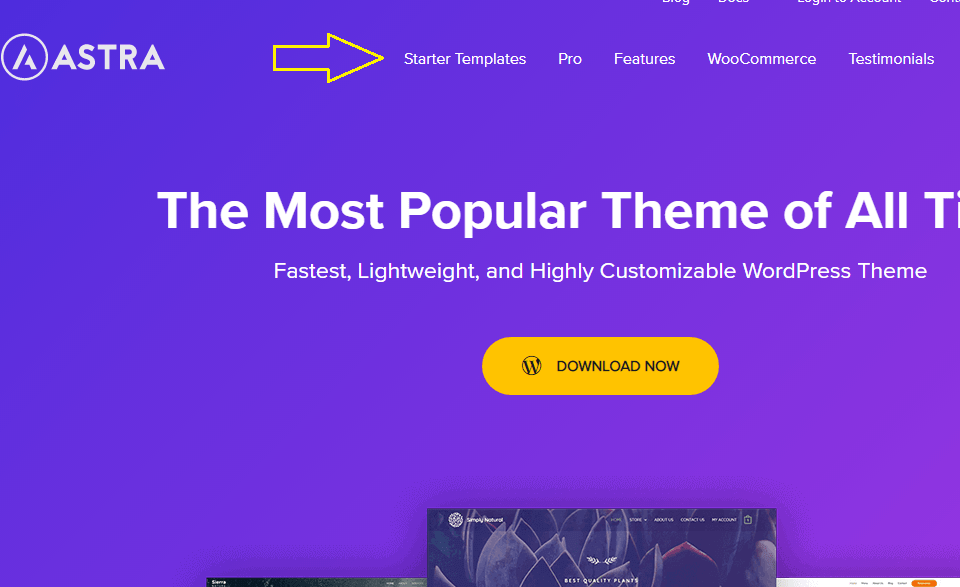
Step 9: Visit Astra and Choose a Design to Use
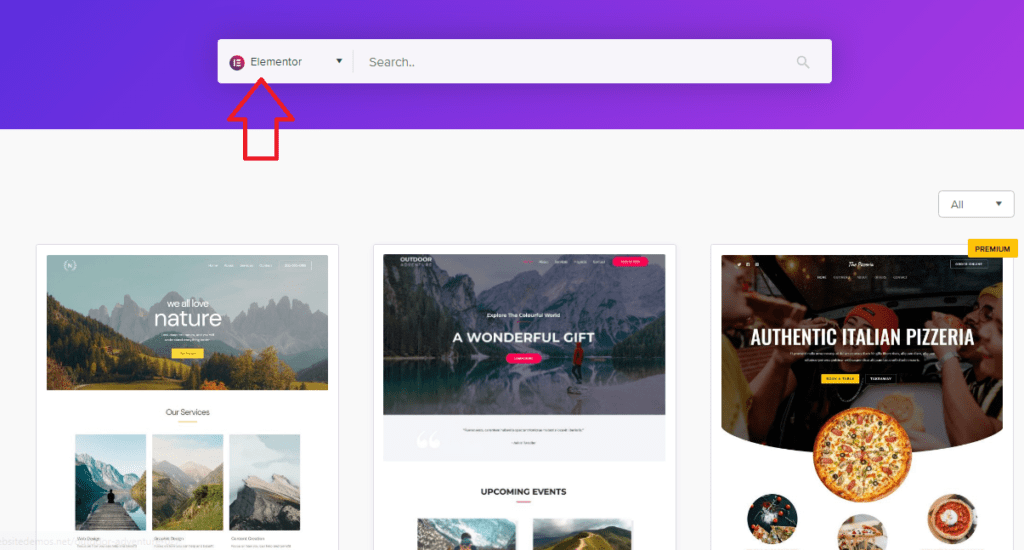
Click here to go to the Astra page and choose a premade design to make your website design super fast and easy. To do that, click on starter templates on the Astra page to look through the free and paid theme and leave the page builder on Elementor.
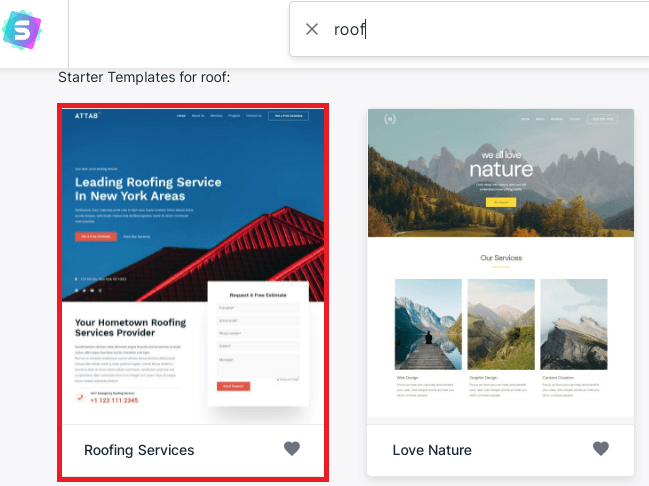
Now browse through the over 180 themes to choose the one that best fits your brand. Those with a premium page are the ones you have to pay for to use. While those without the premium badges are free to use. Those with store or shop included in their names are online stores, so stay away from those unless you want to build a store where customers can pay for products online. Choose a free one too unless you have the money to pay.
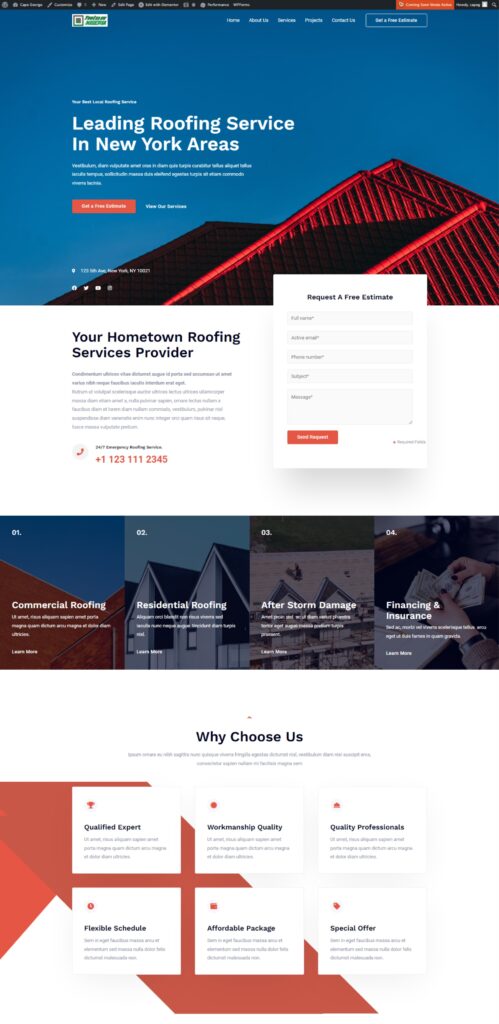
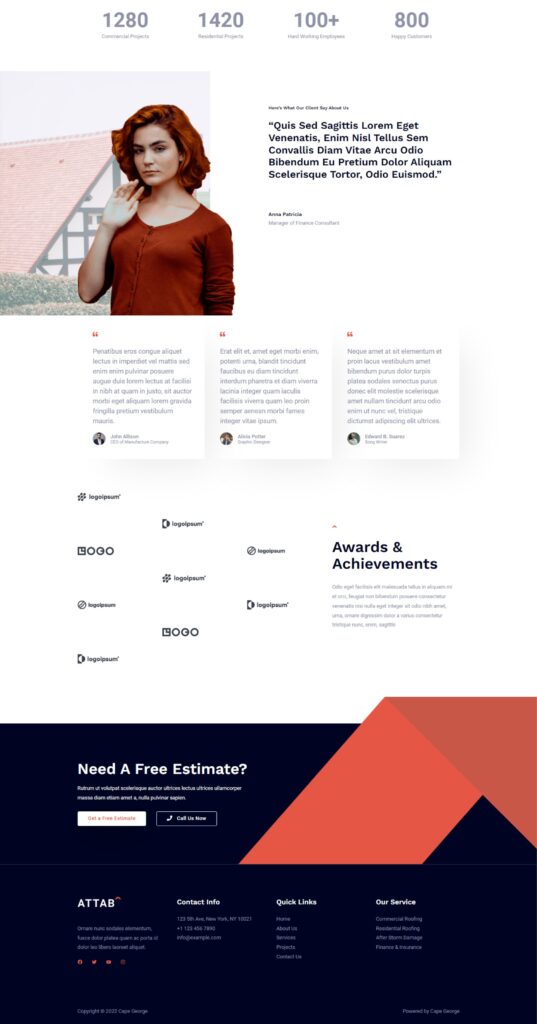
Clicking on any of them will open the design in a new window to enable you to view the design and how your site would look if you choose the design. For the purpose of this lesson, we are using the Roofing Services design. See a glimpse of what it looks like.

Once you have made your choice of design, write down the Astra design name and head back to your WordPress dashboard to install the theme and import the demo data.
What are demo website data?
Demo data is a full web design that includes posts, pages, comments, testimonials, images, etc, that you can import to a new website to enable you to start and finish your design fast.
With demo data imported to your website, your design work is to replace the demo content with your own content while maintaining the design and site structure of the demo. Demo data are used mainly for the promotion of themes.
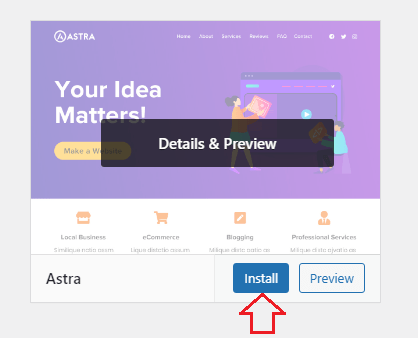
Step 10: Install Your Theme
As has been established, to design the website you need to install your theme of choice, and in this case, we are using Astra. To install the theme head to Appearance → Themes from your WordPress dashboard and click ad new. On the following page, you will see Astra on the first page. If you don’t see Astra, search for it as we searched for the Yoast plugin in the search bar to the right.

Now hover on the Astra theme and click install beneath it.
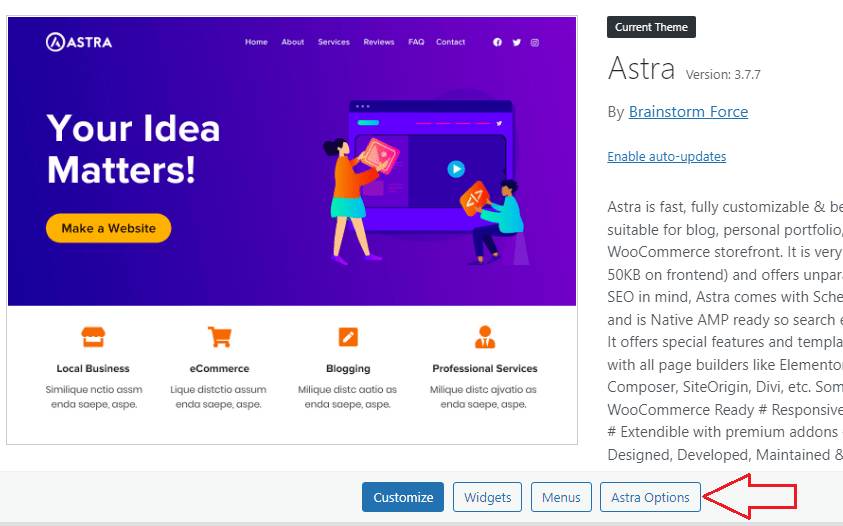
Step 11: Install Demo Importer Plugin
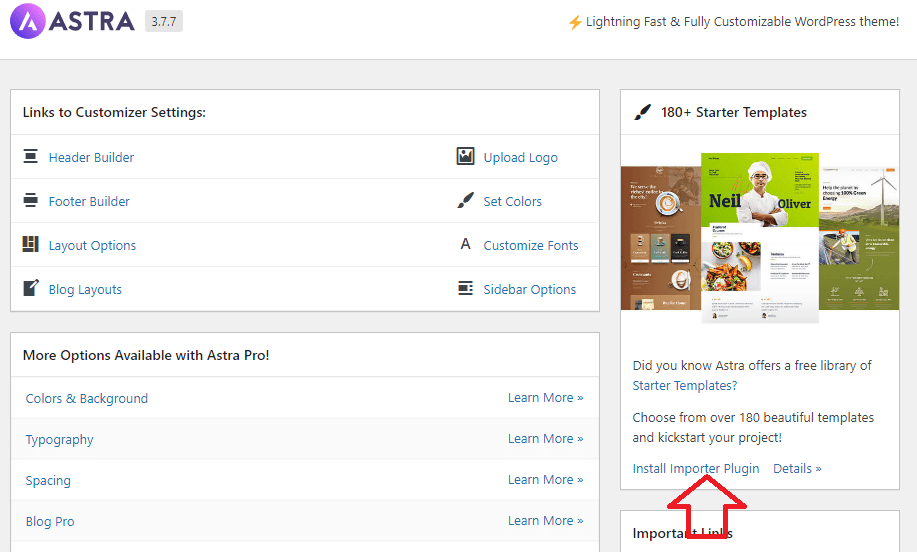
The Astra Theme demo importer plugin would allow you to import the design you chose on the Astra main page. To install it, click on the install importer plugin link shown after clicking on Astra Options above. See the screenshot below for directions.
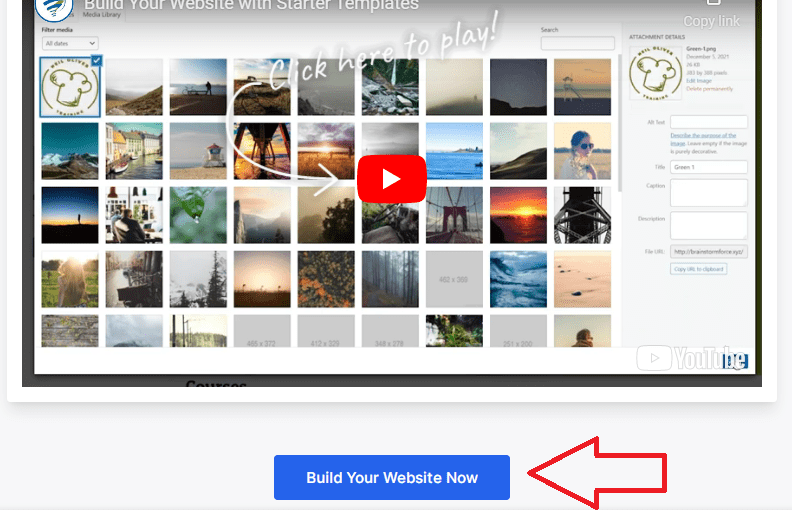
After installing the importer plugin, you would be redirected to a welcome video. Beneath the video, click the Build Your Website Now button to continue.
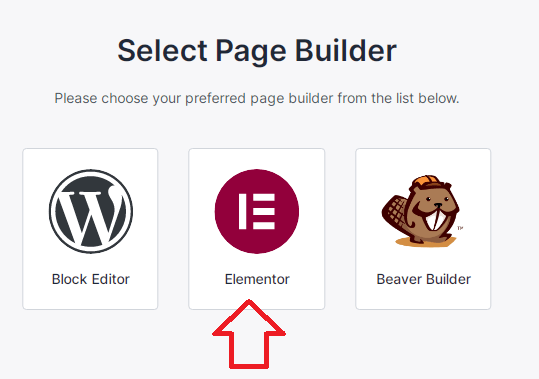
Step 12: Select Your Website Page Builder
The screen that preceeds the Build Your Website Now button presents page builder options for your business website. The pages builders to choose from are:
- Block Editor: Block editor is WordPress default Gutenberg block editor for page building.
- Elementor: This is the most popular WordPress page builder plugin with over 5 million active install. As would be shown soon, Elementor enables you to design your business website on the frontend. Meaning, you can see exactly what you are designing.
- Beaver Builder: Beaver builder is another WordPress plugin with over 200k active installs
In this section, select Elementor page builder as your page website page builder.
Step 13: Locate Your Design Sample
On the next screen, you would see all the Astra designs you saw on the official website. Locate your prefered design by typing the name of the theme you chose on the official website on the search, then click on your choice.
Step 14: Upload Your Website Logo
In this section, you need to upload your website logo, which is your business logo. It’s better you use a logo with a transparent background. If your business logo background is not transparent, use this tool to remove the background if you want to. After uploading your logo, click continue to proceed, or Skip & Continue if your logo is not yet ready.
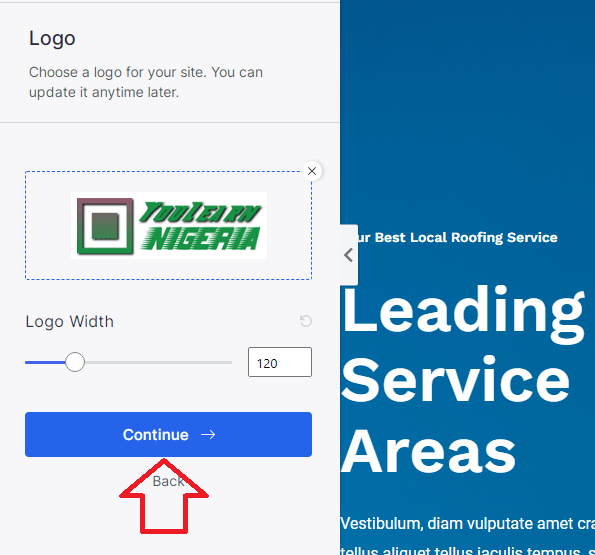
In the next section, you should see color and font customization. Just click continue to get to the final step.
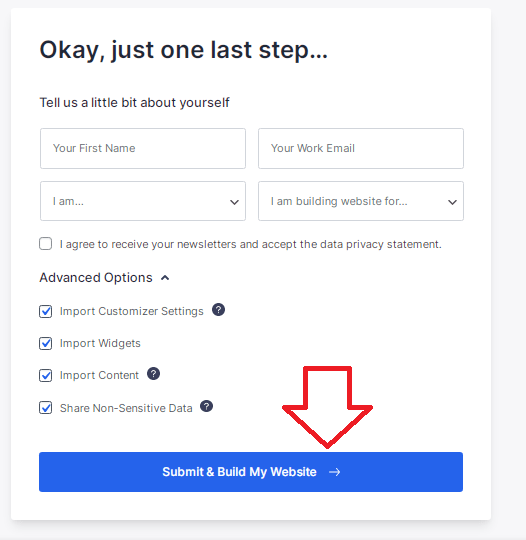
In the final importation section, you would be presented with a form to subscribe to newsletter. If you would like to receive periodic newsletters from Astra, enter your name and email address, agree to terms, then click on “Submit & Build My Website” to complete the process. On the other hand, you can just skip subscribing to the newsletter by clicking “Submit & Build My Website” without entering your information.
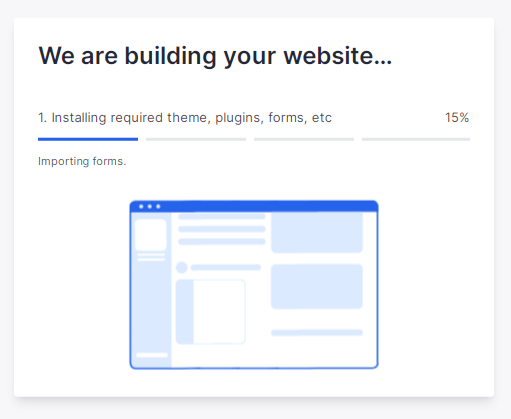
Wait while the wizard build your business website
Now, wait while your website is imported and created. This may take up to 1 or 2 minutes.
Congratulations! Your website is Live
Congrats, your website is live. In the next section, we will learn how to edit the website content to suit your brand. You can now view your website and see what it looks like.
If you used the same theme as the one in this lesson for your design, your home page should look exactly like the screenshot below. Any theme you have chosen, your website should look exactly like the design at this stage.
Step 15: Design/Edit Your Website
We have come to the simple but also crucial aspect of the lesson on how to create a website for business. You have seen that designing a basic beautiful website for your business is totally doable. In this section, we will start designing and editing the website with your company’s information.
That is to say, you will enter your services, about your company, testimonial if any, and projects information on the website. If you prefer to watch the brief video on how to do this instead, click here to skip to the video.
Home page design and editing
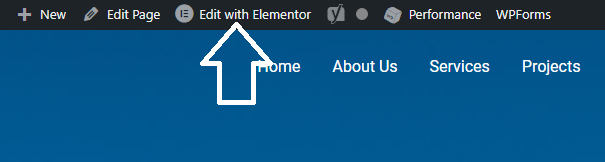
To start your business website home page design and editing, go to your home page URL www.yoursite.com and click the edit with Elementor and the top of the website.
Uploading your website header background image
To upload your header area image background on your home page, do the following as shown in the screenshot and follow the details afterwards:
- 1. Click the section settings icon on the top to reveal the control on the left.
- 2. Click style at the top left
- 3. To upload your prefered background image, click on the image already there to upload a new image from your desktop and insert it.
- 4. Finally, click on update to save your changes.

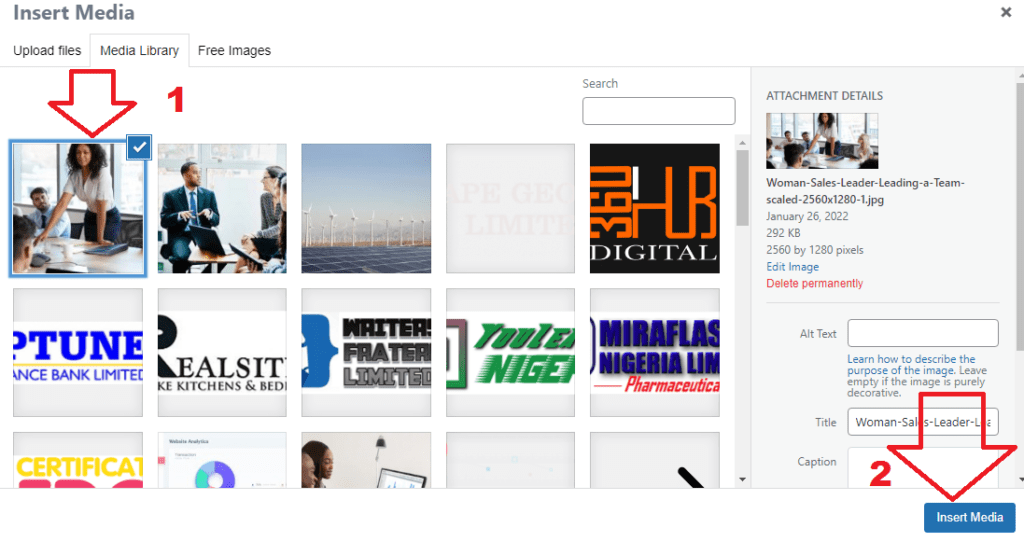
Once your click on style labelled 2 in the image above, then you click on the image directly to reveal the media uploader. It will open to the media library by default to reveal images already on the website. To upload your prefered image, click upload files and click select files to chose an image from your computer folder.
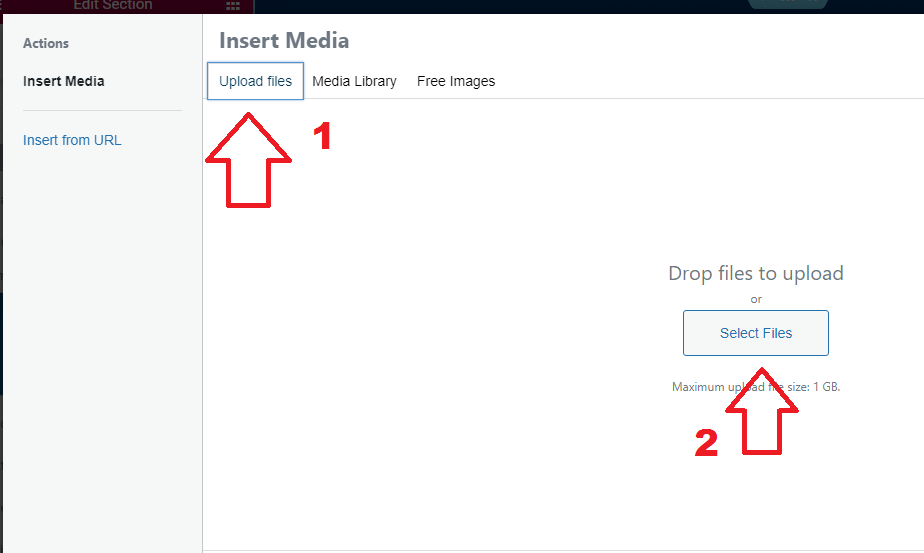
After you upload the image, click the insert media blue button to insert the image you just uploaded.
Creating your business website home page text
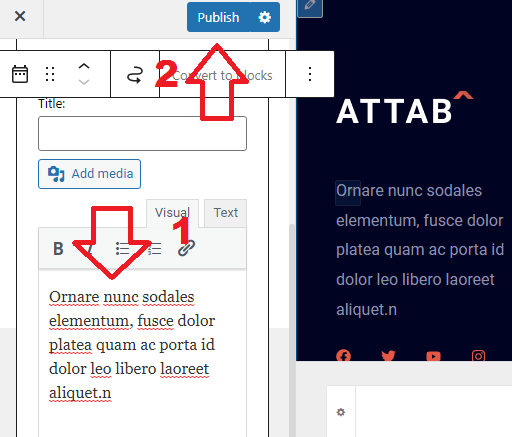
The same method applies to writing your home page title, text and button design. The difference you will not be uploading anything. All you have to do is copy and paste your text in the title and text element. If you don’t know what to write, head to Google and look for 3 to 4 competitors websites and you get an idea.
Clicking on any text section will reveal the control on the left to enable you to change the text to your company’s unique selling propositions. Remember that every change you make must be saved by clicking on the update to publish them.
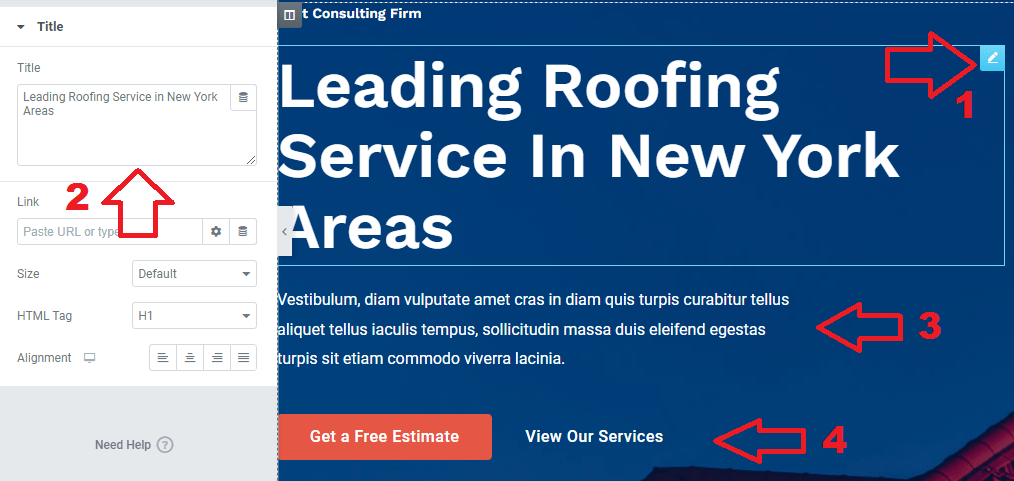
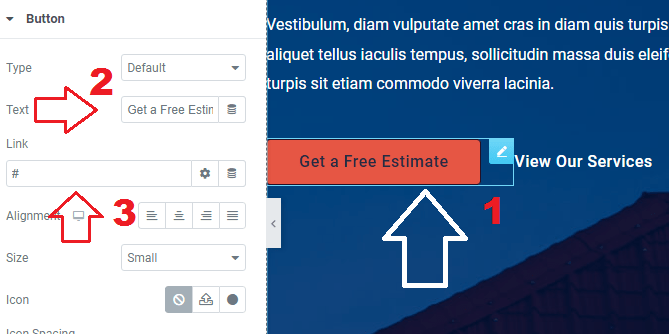
Call to action button editing
You can easily change your header call to action button to what suits your brand as well. To do that, click on the button to reveal the control on the left side. Now enter your prefered button text and link. The spot for the link is the page you want users to land once they click on the button.
Website home page design with Elementor video
To have a seamless design experience follow the same process to design/edit all the pages to your taste. In the next section, we will take a look at how to design the footer and edit the content form.
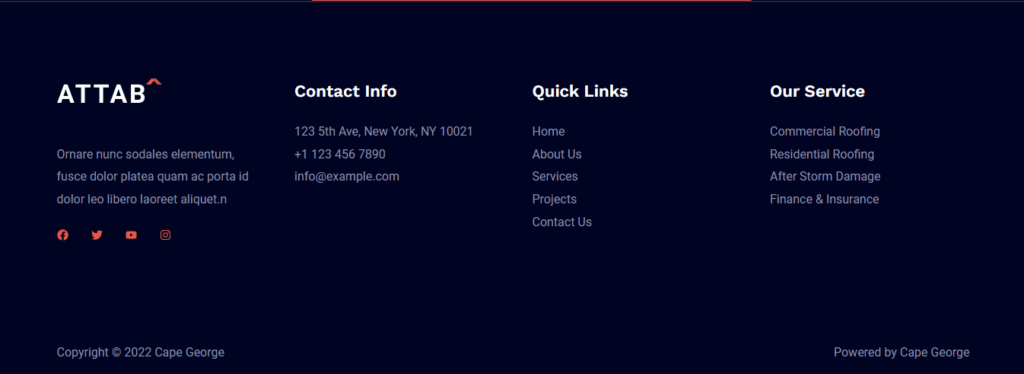
Step 16: Footer Design and Editing
In the last section on how to build a business website, we demonstrated how to design or edit your home page. We also demonstrated that you can use the same method to design/edit all other pages on the website. You can also change icons, buttons, text and all other elements.
That being said, one of the last things you want to do in creating a website for your business is designing the footer. The footer is usually the last section of any website that may contain, quick links, office address, privacy policy, contact details, etc.
To start your footer design, go to appearance → customize → footer builder on the left.
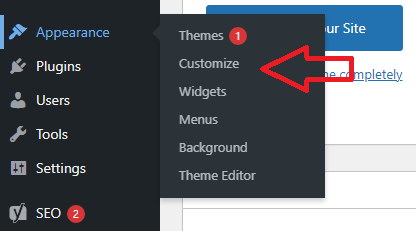
Once the customize section opens, click on the footer builder control element on the left.

The design pattern for the footer is the same as with the rest of the website. Click on any of the footer elements or modules to edit the section from the control on the left. To add any new element, click the global on top of the Elementor control and chose an element to add.
After entering the details you want on your website footer section, click publish to save them.
Footer section and call to action form video
This brief video shows how to design/edit your footer section and your contact form that appears on the home page. The contact form also appears on the contact page in this lesson design. In some designs, the contact page will appear only on the Contact Us page.
Whether the contact form appears on one page or two is not that important. What is most important is the strategic implementation of call to action buttons that leads visitors to your contact form.
Step 17: Website Menu and Navigation Call to Action Button
The menu section will enable you to create and edit navigation for the header and footer. The menu is a collection of links to pages on your website. In this section, we will learn how to create a menu and also the menu call to action button

To create a menu, go to Appearance → Menu → Create menu → add links. See video below
Customizing your call to action button, go to Appearance → Customize → Header builder → Button → now enter your button text and link.
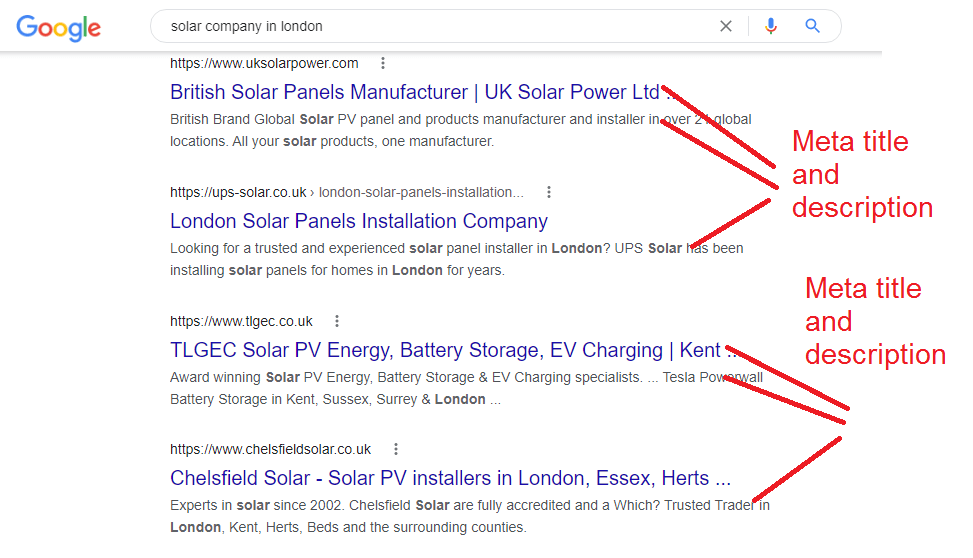
Step 18: Setting Up Metadata For Your Pages
In simple terms, metadata is a brief explanation of what your home and other pages are about. A well-written meta title and description can help with your SEO. This help search engines understand your page and shows the same to searchers.
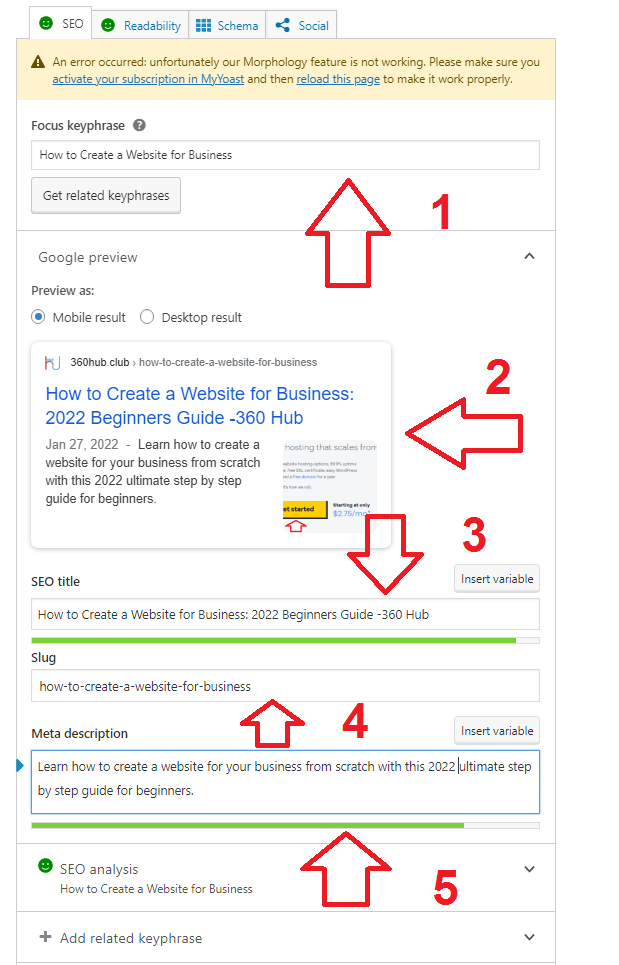
To set your metadata properly you need to understand how to get it setup. To create one for each page, go to Pages → All pages → click edit beneath the page you want to edit when you hover on it. Scroll down the page to edit your metadata with Yoast. Your website metadata comprises of the following:
- 1.) Focus keyphrase: The keyword you are targeting with the page. (You can leave blank)
- 2.) Mobile & Desktop: Preview of what Google would show to users.
- 3.) SEO title: The page title with the right keywords (May be different from the normal title)
- 4.) Slug: The post link that you can optimize
- 5.) Meta description: Description of what the page is about.
For a better understanding, see the screenshot of this post metadata while still in development.
Furthermore, to get a deeper understanding and usage guide, read Neil Patel’s and Yoast’s guide on metadata setup.
Step 19: Basic Page Creation and Design
At this stage, your website is good to go. But what if you want to create additional pages to what your design of choice offers. Pages are the mediums for showcasing your products and services when making a website for your business.
For instance, if you sell products and you need to articulate their individual unique selling points, page creation is the answer. For any additional product or service, you need to create a new page and content for that page.
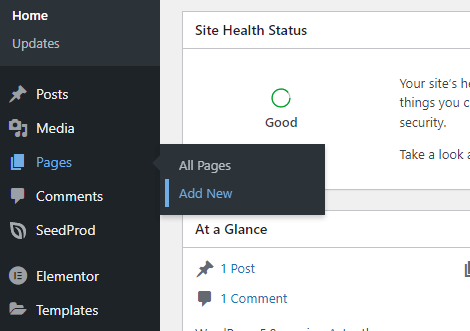
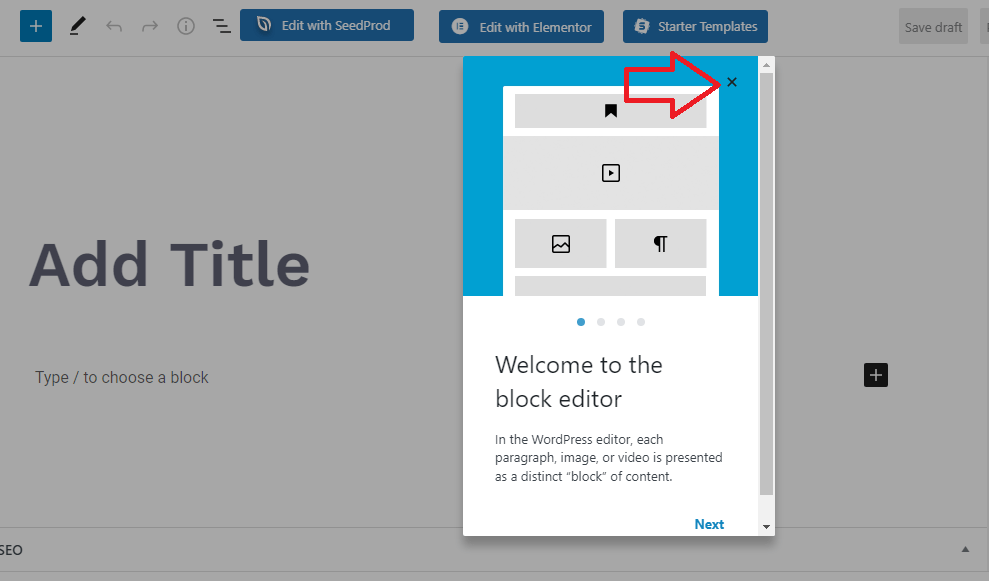
To create a new page go to Pages → Add new and you will be taken to the screen below. If you are creating a page for the first time, you will be greeted by the Block Editor’s welcome message. Click on the close icon to enter the Gutenberg block editor.
Gutenberg block editor overview
The default page editor is the easiest and fastest way to create additional pages on your website.
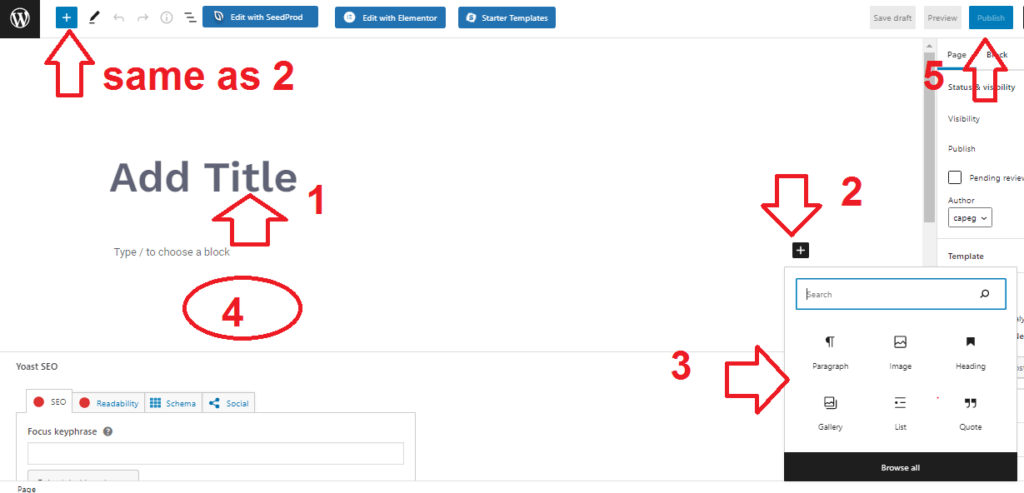
- 1.) Page titke: The headline of the page you are creating.
- 2.) Blocks: Browsw the various elements to enable you create the page the way you want it. To reveal and search the available elements, click either of the plus button.
- 3.) Blocks and elements: There are a variety of blocks to enable you create a nice page. The blocks a divided into main categories like Text, Media, Design, Widgets, Theme, and Embed. The best line of action is just take a tour of the blocks by clicking the block + sign at the top right.
- 4.) Page content: Click on blocks you want to use and continue with your content creation.
- 5.) Publish: After you added all your content for the page you want to create, click on publish.
Adding your new page to the menu
The new page you have created needs to be visible to your website visitors from the navigation. To add the page, view the page after publishing → copy the page link – go to the menu section under appearance and follow the menu guide to add the link.
You can also decide to add certain page links in the main navigation and others in the footer section.
Conclusion
Congratulations, your business website design is complete and live. Your quest to learn how to create a website for your business has been successful.
Another thing you want to learn is how to promote your business on Facebook. Granted that your website is up and running, it will take a while for it to rank on Google. But, if you want to get customers fast, you need Facebook and Google ads to drive growth faster.
If you have any questions regarding this guide, leave them in the comment section below and we will answer them.
How To Create a Website for Business FAQ
Making a website for your business could start from $500 or less depending on your location and the kind of website you want. But if you are following a guide on how to make a website for a business like this one, you will spen less than $100.
Yes and no. Yes for a simple website and no for a complicated one.
Web design is an aspect of digital marketing but not digital marketing itself
A business website can improve sales by many ways. In simple terms, you can keep your business open 24/7, adequately promote your business for free via Google search and much more.
Yes. Anyone can learn web design using CMS platforms like WordPress, Joomla, Magento, etc.
You can create and launch your website in a day if you have your content ready.


0 Comments