
How to Create a Business Website (2021 Video Guide)
Learn from scratch how to create a business website for your company in few hours without technical skills. If your interest is to create a news blog/magazine Click here. Continue reading for business website design.
A website is the most cost-effective marketing tool available today. In this video guide, you will learn how to create a website for your business and get it up and running today even if you don’t have any technical or know one code.
Step one: Click here for your domain and hosting registration and follow the video guide to build a fast loading website for your business.
WordPress Admin or Backend URL part example ➜ www.yourdomain.com/wp-admin (replace your domain with your actual domain name)
Video Two
By now you feel the excitement of having your website launched. But there are few other things left to be done. One of such is creating personalised and professional email addresses for your company, yourself and team members to help boost trust and get more conversions in your dealings.
Create Business Email From Cpanel For Your Website
To create free professional emails for your business and your team. Login to your hosting account portal. This is the account created when you purchased your hosting account. Once you login, click on hosting and when the page opens, click Cpanel to continue as shown blow.


Clicking on Cpanel will take you to the control panel of your website. Once there click email as shown in the snapshot below.
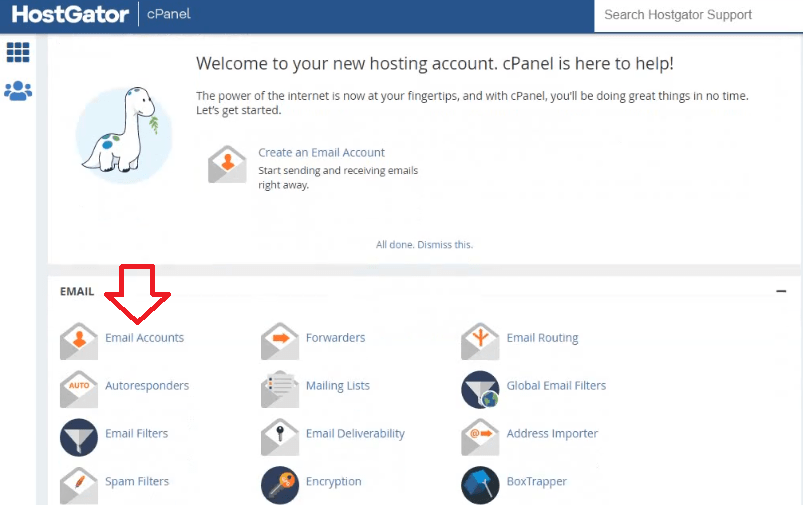
Now locate create on the far right and click it to create your very first email address for your business.
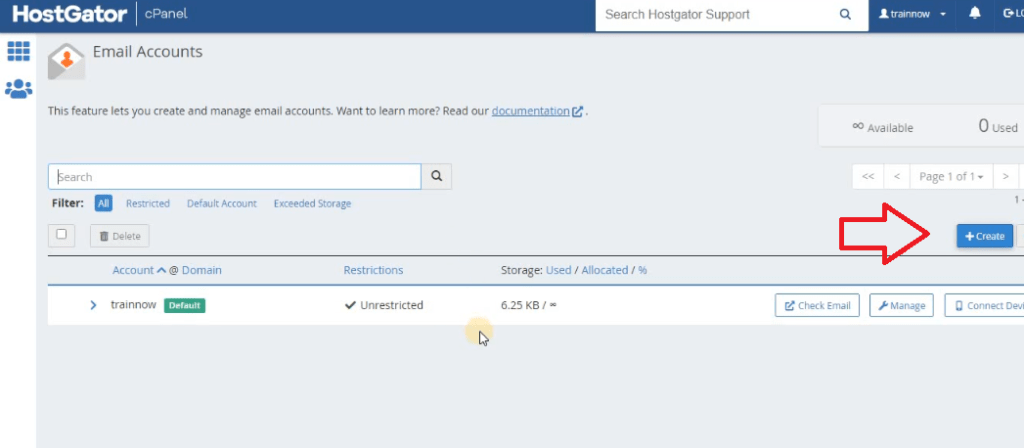
After clicking on the create button as shown above, you want to do the following in accordance to the screenshot below.
1. Chose email username, it could be info, support, your name or anything. Just enter the name without the @ sign.
2. Enter a strong password that you can easily remember. If you can’t remember, write it down somewhere.
3. You could clik on the eye icon to see your password.
4. Click create to complete your email creation. You can create as many as you need.

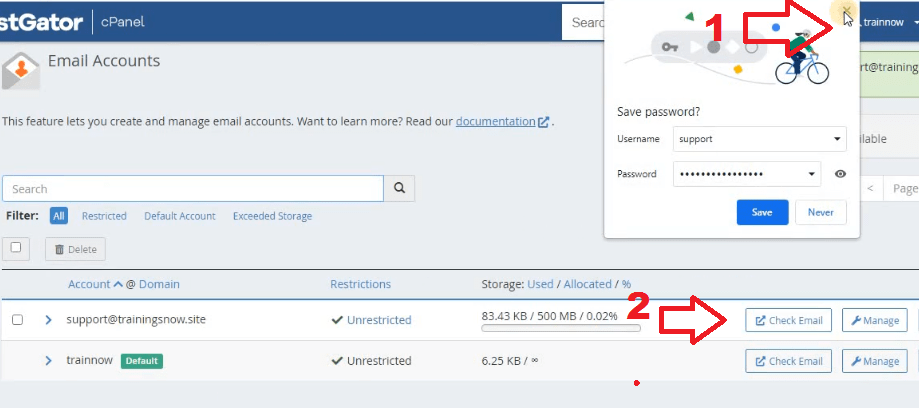
After clicking the create button as shown above, you will have to cancel out the pop window in the next page that ask for you to save/update your password if you normally save passwords to your browser.
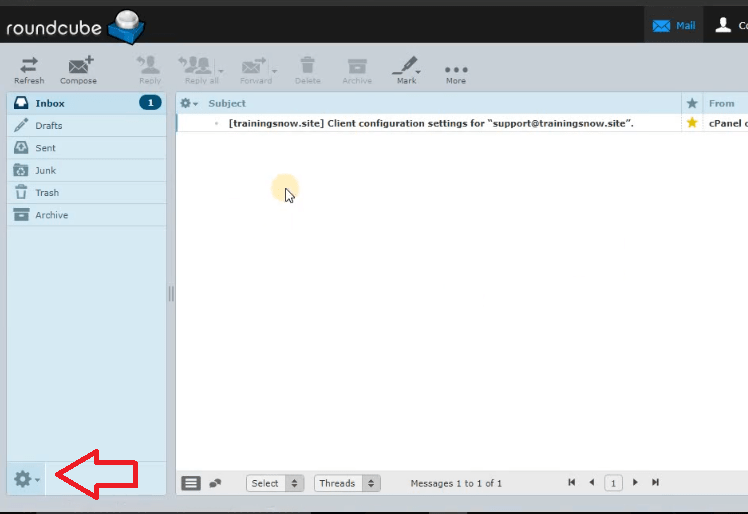
To check your email, click check email as shown below.
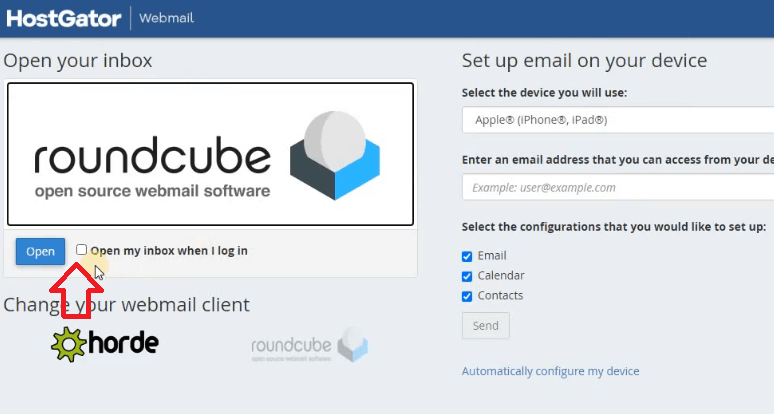
After clicking on check email, you will have the option to choose your mail client in the next window. Tick open my inbox when and I log in and click open to view your inbox. If you don’t want to use Roundcube, you can select Horde beneath and use that.
When your mail opens, the first thing you want to do is click on settings on the left corner and select manage folders to set your display name. (The name people see when they receive your mail)
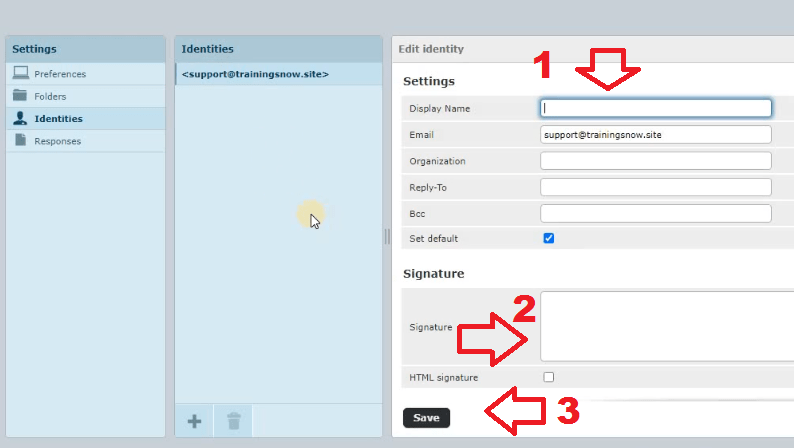
When the folder opens, click on identities, click the email address under identities and enter the display name which could be your name or the name of the company or the relevant user you are creating an email for. Then create a signature if you like. Save to complete.
That is how you can create as many emails as you want for your company website.
Other Resources to Help Your Business Standout and Gain More Clients
Now that your website is launched and ready, below are some other content that can help your venture.
How to create Google My Business Page
How To Use Email Marketing to Grow Your Business
How to Rank Your Fresh Website Content on Google
If you have any questions, ask in the comment section below and we will answer them.
Best of luck in your endeavours


0 Comments